This post explains high-level overview of AZURE search service and its key features. Part1 includes creating a search service in Azure portal, building search indexes, uploading documents and retrieving using AZURE REST API. Azure search service REST API can be consumed by web apps and cross-platform mobile apps for showing compelling search results.
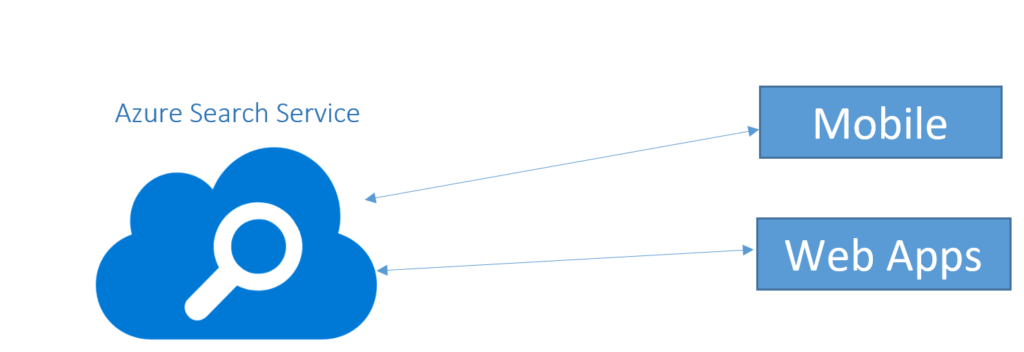
Why AZURE Search Service?
Azure Search service is hosted in Microsoft Cloud platform which provides built-in query abilities like natural language processing, search recommendations, GEO search and scoring profiles. Natural language service really help you to build apps with good search experience. With scoring profiles you can get more relevant results and also you can promote by assigning a score, higher the score more relevant the results.
Creating a Azure Search Service in portal
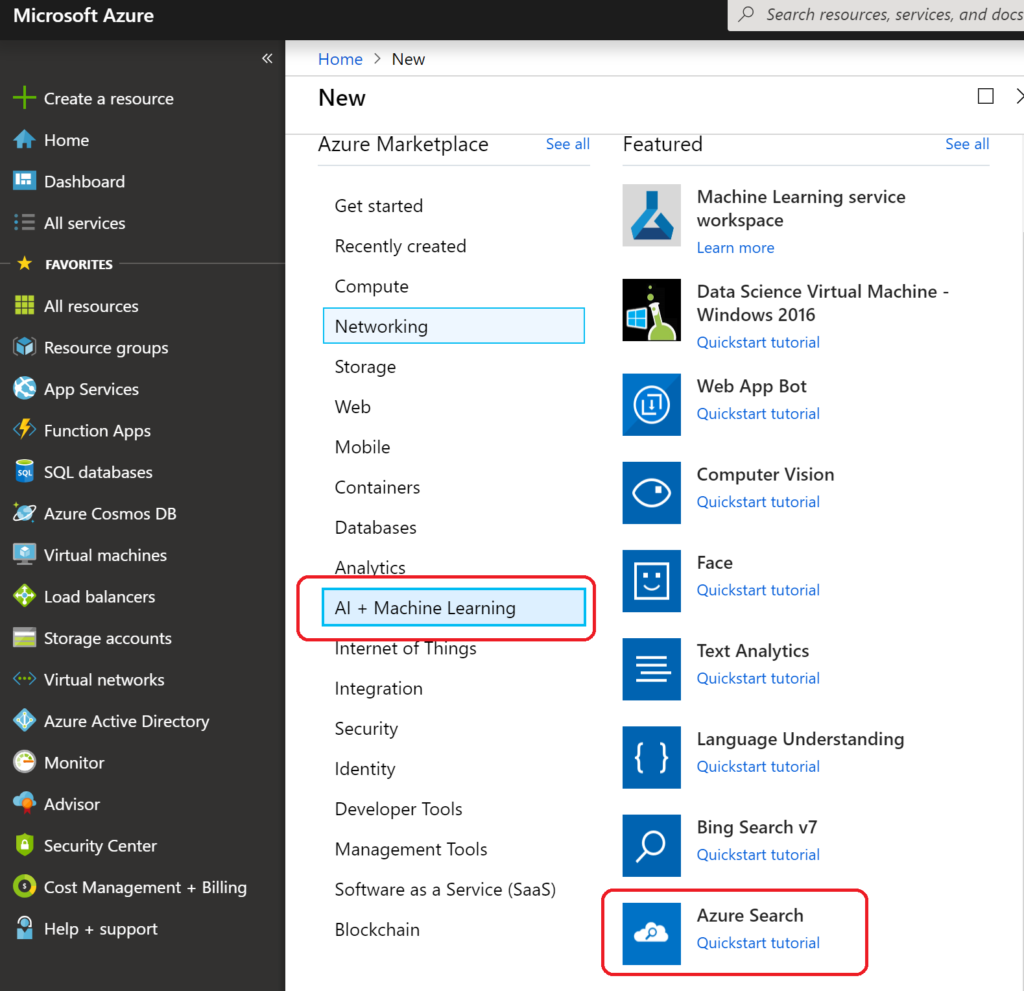
login to AZURE portal , add new service then select AZURE Search from AI+Machine learning category
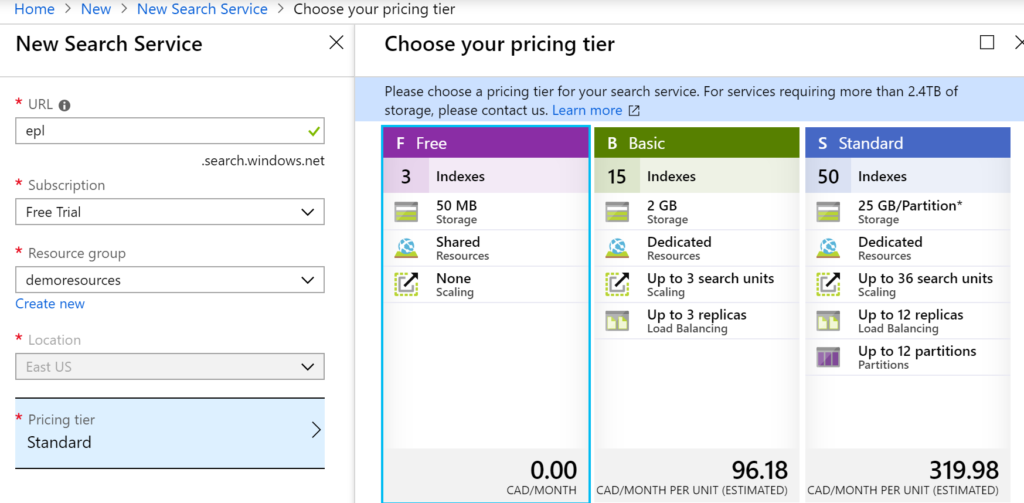
give a name to service and select desired pricing tier and say create.
Creating indexes and documents
To create great search experience you need to understand the relationship between indexes and documents. Index is like a table in SQL database but highly optimized to return the results for search terms. Document is basically a record inside index. Document contains flat data.
Create Index using Azure Portal
You can create Index in azure portal or using REST API. Every Search Index must have two properties name and fields. Name property identifies the search index and it will be part of the URL example: field property describes the data inside index. Each field has name and type. Each search index can have 1000 fields max. Do not put more data inside search index, more compact index is the faster search results. The example used to create index is Soccer (Football in UK) teams.
Navigate to the search service that you have created in earlier step and say create index as shown in following screenshot
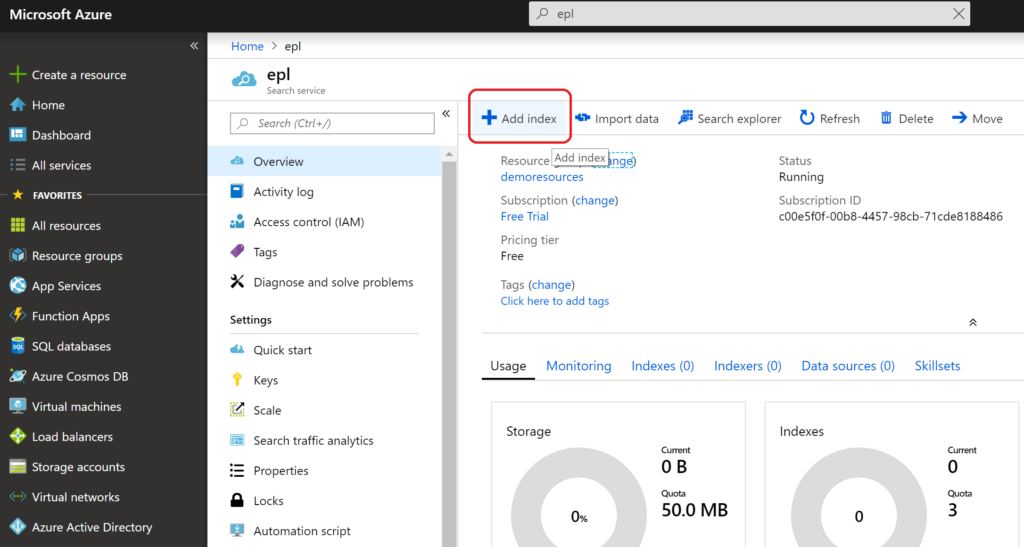
By default id field will be added to your index. You can add additional fields and their data types to your index.
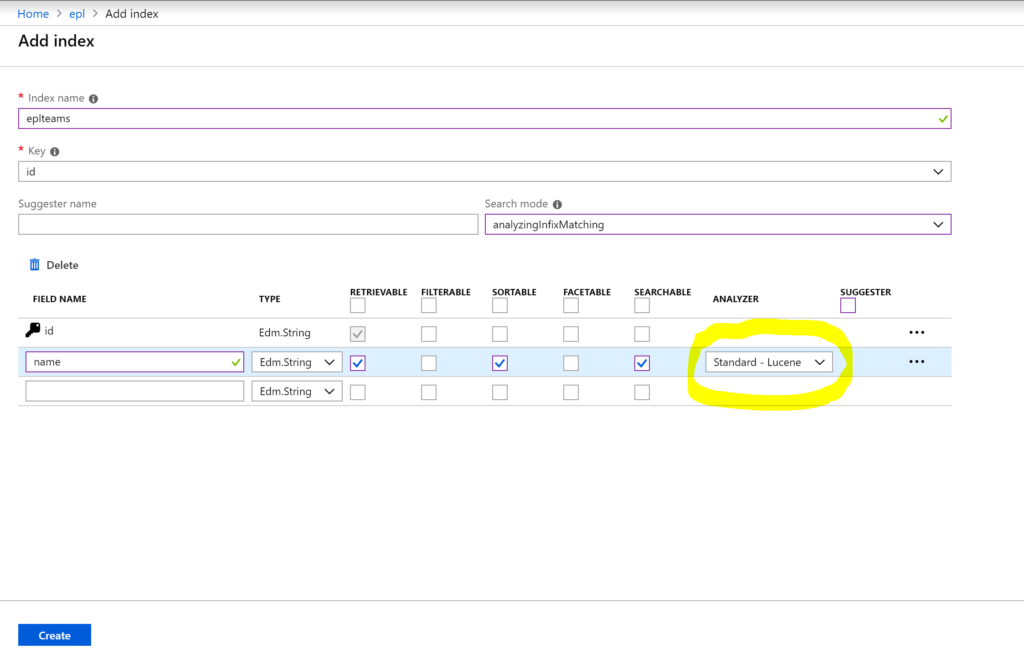
You have options to mark your field retrievable, searchable , sortable and filterable. You can also add natural language analyzer to field as high-lighted above, select English – Microsoft.
Create index using REST API
open postman , create a post request as follows
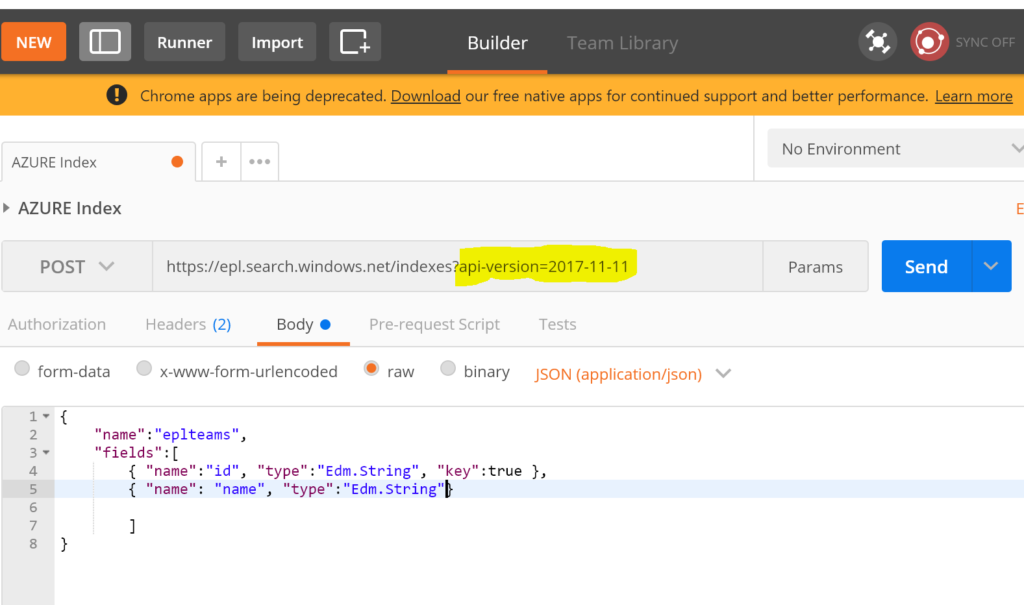
To make REST API call, you first need to add query parameter api-version to your request with value at this time is 2017-11-11. You also need to add two header keys api key and content-type to post request.
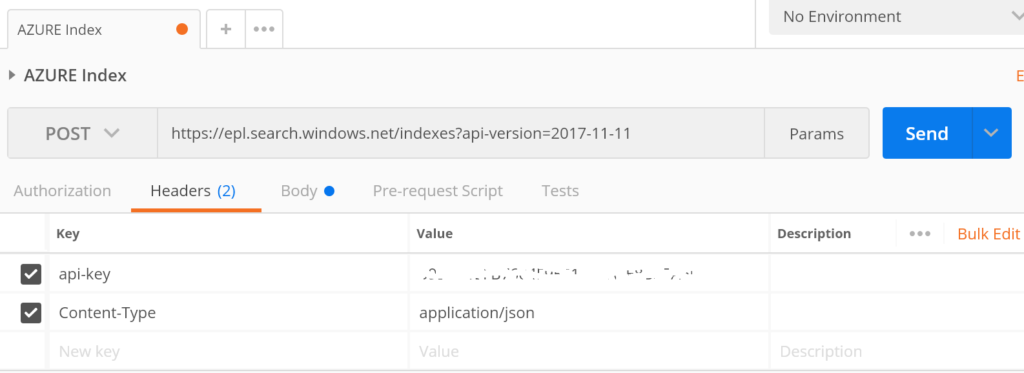
You can find api key in azure portal under azure search service

Create Documents in AZURE Search Index
You need to upload soccer team data to your search service work as expected. The documents in index are managed by @search action property. The possible values for @search action are upload, merge, merger or upload and delete. Following screen shows request url and body that required to upload a document
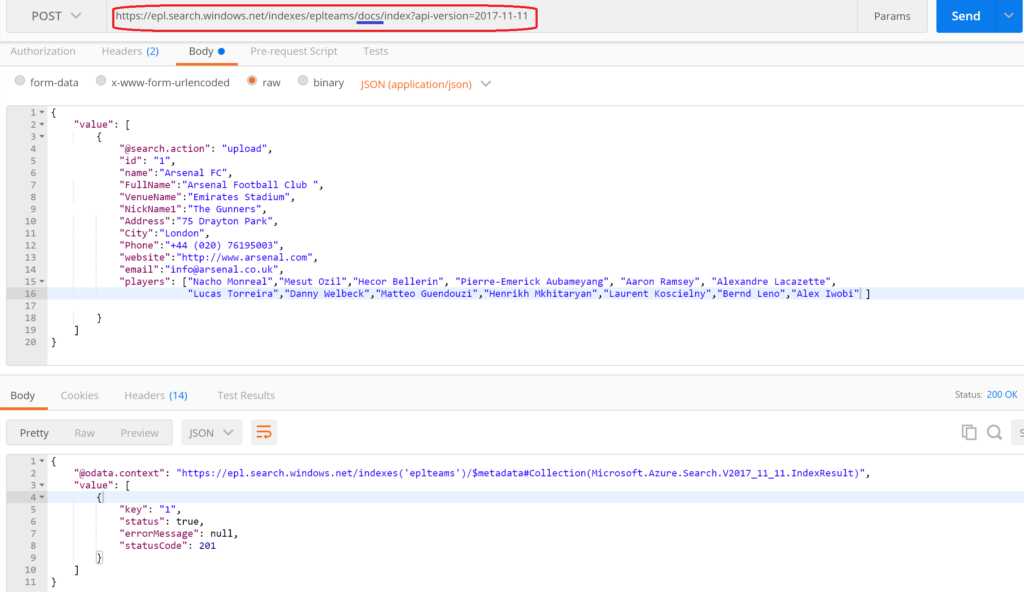
Notice the request URL contains docs , header keys are same that you have used in earlier step. Each document is a key-value pair contains values of fields that you defined in search index. You can send multiple documents up to 1000 in one batch. if you want to update or add a particular field to existing document then just use @search.action mergeorupload.
Reading documents from Search Index
Following sample get request retrieves all the documents in search index ” https://epl.search.windows.net/indexes/eplteams/docs?api-version=2017-11-11&search=* “
search=* returns all records, if you do not want all records then you can add field names that you want in get request . More on using Search Document parameters can be read here https://docs.microsoft.com/en-us/rest/api/searchservice/Search-Documents?redirectedfrom=MSDNÂ
I will explain more on using filters and scoring profiles in part 2 article with asp.net core web application with code so stay tune!