As Xamarin allows us to build iOS, Android and windows applications, this post outlines the steps that required developing an iOS application using Xamarin and Visual Studio. What is Xamarin? Build and execution model is different from iOS and Android. In iOS you have something called “Ahead of Timeâ€(AOT) compiling which is basically there to compile your application down to native code. Apple basically says you have to have your binary code on AppStore and it should build on Mac machine. This is exactly what Xamarin does for you.
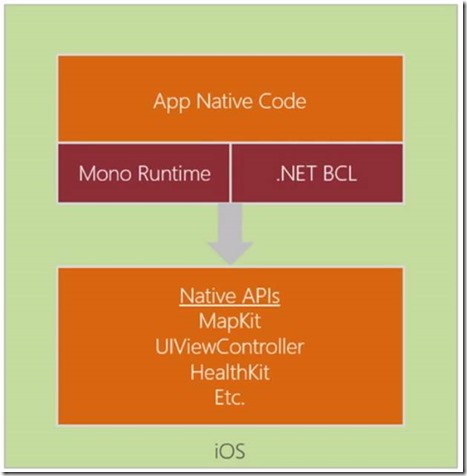
It is good to know the iOS runtime model before writing the code for it. The iOS runtime essentially looks as shown in the following picture
You have iOS which is a platform and your APP native code; within their you have mono runtime .net base class libraries. Xamarin does some really interesting things like they compile your application and remove anything that is not used properties and methods to keep the file size small.
iOS Application Lifecycle & Structure
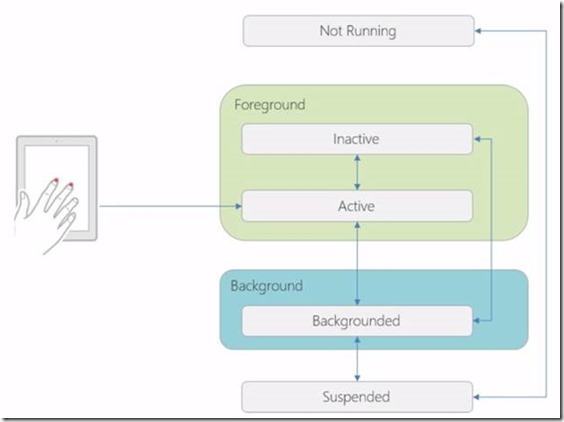
You have an application in iOS in foreground with two states as active or inactive states. When your application goes to background it is in backgrounded state. When it is not running state then it is obviously in Not Running state.
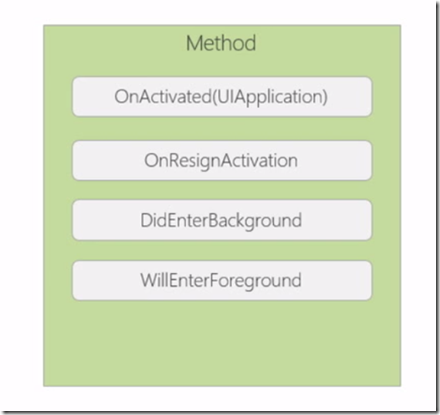
When user comes in and uses your App and it will be started up and in Active State, it could be in inactive state for example if phone call comes in or person hits the home button, it could be backgrounded at that point of the time. From the backgrounded state, it could go to active or inactive states. Xamarin notifies us all these states using various overrides in AppDelegates.cs file.
The methods in the delegate for overriding are as follows
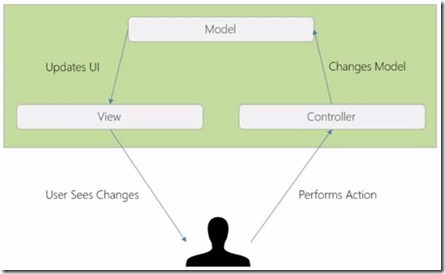
iOS Application uses MVC pattern
User performs an action into the controller it then changes the model and updates the UI. You also have states in view controller (UIViewController) level.
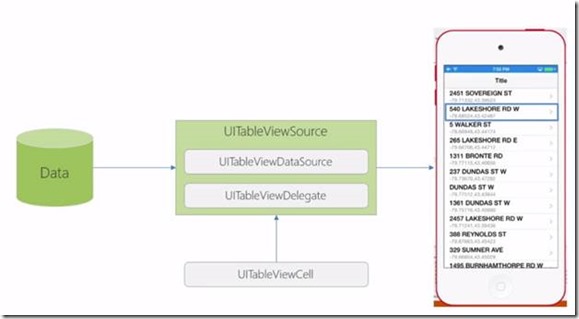
During the view development you can use UITableView control which is essential a list view control can be used to show the list of data. You have the data and it is associated with UITableViewSource and you also going to have cells to present the data.
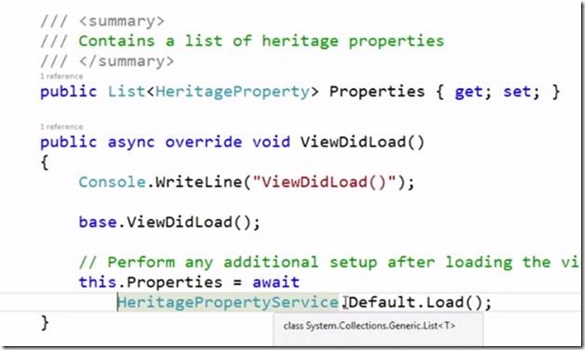
Loading the data in tableview
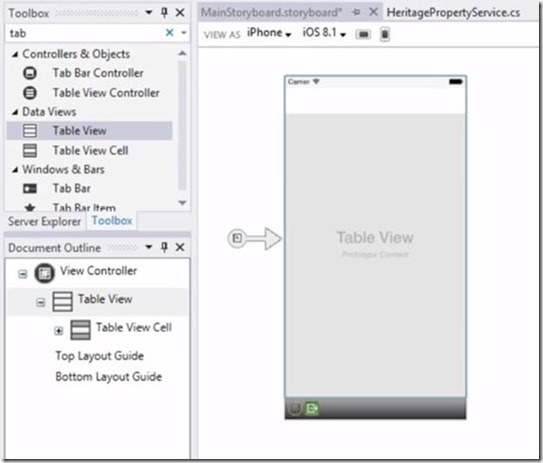
To bind the returned data to the UI, open the storyboard file from the solution and then drag table view and table view cell controls.
Enable document outline to see what is placed in story board. Set the identifiers to both Table View and Table View Cell.
You can bind the loaded data to tableview control as shown in the following picture
In HeritagePropertiesTableViewSource class, you have the logic to iterate and bind the data to cells
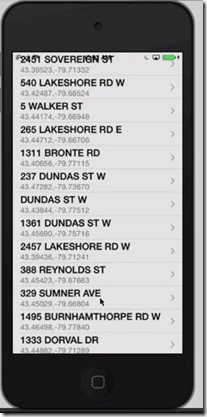
When you run the application then you see the data something like in the following screenshot


![clip_image002[1] clip_image002[1]](https://www.techbubbles.com/wp-content/uploads/2015/02/clip_image0021_thumb1.jpg)
![clip_image004[1] clip_image004[1]](https://www.techbubbles.com/wp-content/uploads/2015/02/clip_image0041_thumb1.jpg)
