Introduction
Activities are basic units in workflow execution. Activities are two types basic activities and composite activities. Basic activities are steps in the workflow and composite activities can contain other activities.
Base activities are comes with Workflow Foundation and these can be used by dragging it from visual studio toolbox. We can also create custom activities that appear in the visual studio toolbox.
Activities are like classes and we can define properties, methods and events.
We can build an activity or multiple activities into .NET assembly and deploy them as re-usable assemblies.
In this post we will learn how to create custom activities and properties in workflow foundation.
Create a workflow project
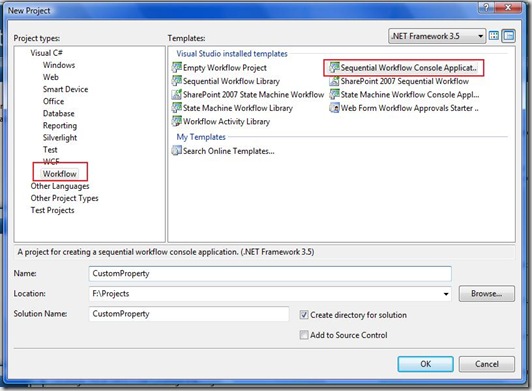
1. Create a workflow project by selecting the File->New->Project menu command and it displays a dialogue box select the Sequential Workflow Console Application template and click ok.
2. Rename the Workflow1.cs workflow to SendMailWorkflow.cs.
Create an Activity Project
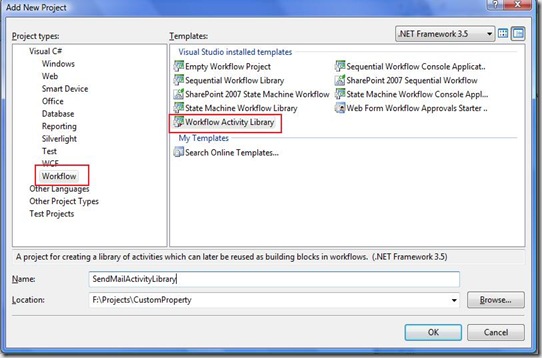
1. Add new project to the existing solution by selecting the Add new project option. select the Workflow Activity Library template from the dialogue box.
2. Enter the SendMailActivityLibrary in the name field and visual studio creates a active library project.
3. Rename the single activity named ativity1 to SendMailActivity.
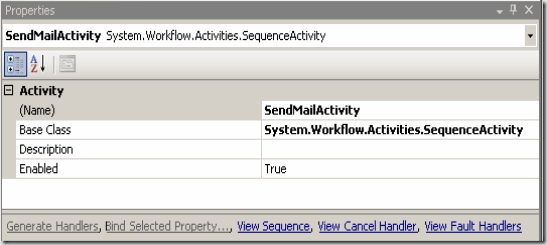
4. Click on the SendMailActivity in the workarea to view the properties window.
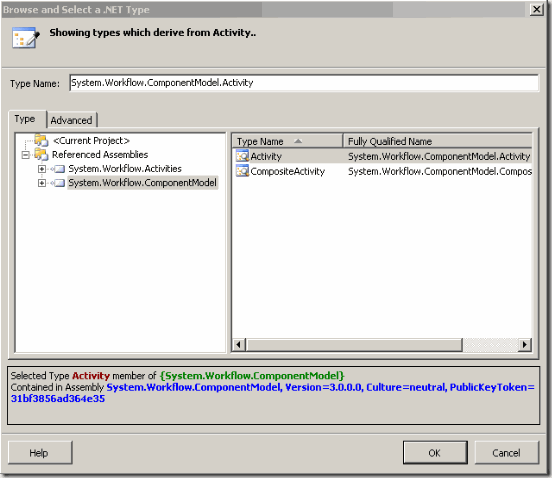
5. Select the Base Class property from the properties window which displays the following dialogue box
6.In the type tab, Select the System.Workflow.ComponentModel.
7.The list box in the right side displays the available base classes activity and composite activity.
8. Select activity and click Ok.
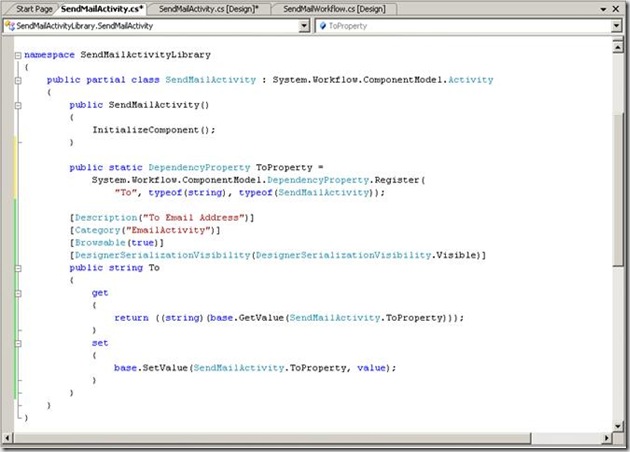
9. In the code beside file for the send mail activity write the following code
10. In the same way we can write the properties for From, Subject and Body.
11. Build the Workflow solution notice that sendmailactivity is now present in the Tollbox window.
12. Drag the SendMailActivity from the Toolbox window and drop it on the workflow designer area and change the name property of the activity to sendMail.
13. You can see the custom properties that we have created in the previous steps.
14. Add an Executor Component to the SendMailActivity.cs file
protected override ActivityExecutionStatus Execute(ActivityExecutionContext executionContext)
{
Console.WriteLine(To);
return ActivityExecutionStatus.Closed;}
Conclusion
We have learned how to create a custom activity and property in workflow foundation and using the defined property in the customactivity.
![clip_image002[9] clip_image002[9]](https://www.techbubbles.com/wp-content/uploads/2008/10/clip-image0029-thumb.jpg)
![clip_image002[11] clip_image002[11]](https://www.techbubbles.com/wp-content/uploads/2008/10/clip-image00211-thumb.jpg)
Creating Custom Activities in Windows Workflow Foundation…
You’ve been kicked (a good thing) – Trackback from DotNetKicks.com…
Nice tutorial..
how to create workflowfoundation in web application
Very good article
Good articles.Looking forward to see more articles on sharepoint
Thanks. I will try to post more interesting articles on sharepoint 2010.